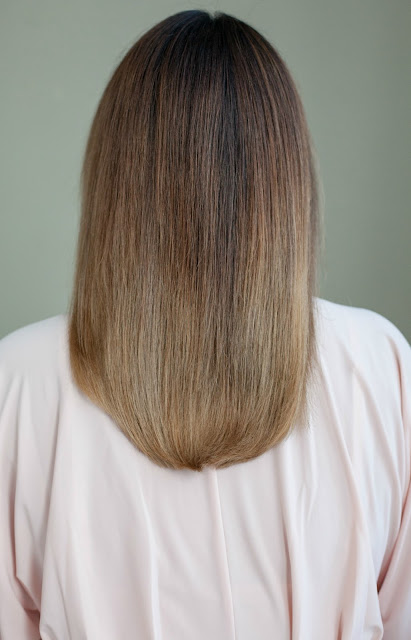
 Photos by Rob Trendiak (Instagram) | Hair Styling by Eliza Trendiak (Instagram) | Hair Extensions by Veronica Gomes (Instagram)
...
As some of you may know, I love changing up my hairstyles!
I've had blonde hair. I've had black hair. I've had long hair. And, I've had short hair. So, when my amazing hair stylist, Eliza Trendiak (owner Artel Salon here in Vancouver), and I started chatting about extensions I was super keen to give some clip-ins a try. For me, clip-in extensions are perfect - I can still choose to style my shorter hair, and, when I want to feel extra glam, I totally can, too!
Clip-in extensions are everywhere on Instagram, and all over the internet. There are some good ones out there for sure, but most of us don't have just one flat color of hair - and that makes color matching a huge issue. And, there is really nothing worse than a bad match. My particular set of extensions comes from local Vancouver extension expert, Veronica Gomes Hair. If you are in Vancouver, and interested in getting a pair, I would highly recommend contacting her! They are ethically sourced and the best quality hair extensions that I have ever seen. The best feature of my pair is that they are thick all the way to the bottom, which is important to me, because I have a ton of fine hair. Also, because I have a blunt hair cut, having thick hair extensions are a must, so that they look well-blended!
After picking your perfect pair of extensions, the next most important thing to know is how to put them in, so that they look natural and blended. Since I just learned from the best how to put them in, I'd love to share step-by-step instructions for all of you that might also want to know.
1) Lay out the extensions, and plan which order you will put them in. Keep in mind that the wefts get larger as you move up the head. The only exceptions are the two smallest pieces - save those two for the temples, as they will help frame your face.
2) Now you are ready to start clipping them in! Start by creating a horseshoe-shaped section at the nape of the neck, 1 - 2 inches above the hairline at the base of your neck. It's really important to have a slight curve in the parting to follow the roundness of your head shape.
3) If you have finer hair, apply texture spray, dry shampoo or backcombing powder (anything to add some grit), and gently backcomb. This will act as the base for the extension to clip into and secure.
4) Always secure the middle clip of the weft first to ensure it is centered on the head, then attach the outer clips.
5) Continue up the head spacing each weft one to two inches apart. Always check the back of the head to make sure none of the extensions are showing, and the hair is blending well.
6) For side panels, make a diagonal back-parting starting from your temple, to just behind the ear.
7) Backcomb as usual and apply wefts parallel to the parting. This helps the hair follow the natural fall of the hair around the face.
Lastly, I would also highly recommend having the extensions professionally cut to blend with your natural hair and style, as desired. And, when it comes to washing and drying your extensions, I would only do it when you have a noticeable build-up of products. Washing your extensions less reduces the amount of shedding, and increases their longevity. And, I would also recommend only using salon-quality products.
Check back for a second post, in which I'll share a few of my new fav ways to style these fab extensions :)
xo Ally


This is amazing! I have always been hesitant to try clip-ins but this looks really amazing
ReplyDeleteThanks so much Heather! So glad that you think so! I definitely had the same thoughts before I tried them out!
ReplyDeletexo Ally
They have specialist of latest hair style for long, short and any kind of hairs.
ReplyDeletehttp://hmhairspa.com/
The natural word is quite famous and most of the skin care products are being sold out under this name. You should realize that the natural beauty is a good sign and all people will certainly love you. Click reference
ReplyDeleteMy friend mentioned to me your blog, so I thought I’d read it for myself. Very interesting insights, will be back for more! Relationship
ReplyDeleteI use only high quality materials - you can see them at: wholesale beauty products
ReplyDeleteThank you because you have been willing to share information with us. we will always appreciate all you have done here because I know you are very concerned with our. cbd bath bombs
ReplyDelete